Project Setting
After users enter the project, they can find the project's setting page (Setting section), which supports users to operate the project's project member management / project deletion / project extranet service / project data migration, etc.
Project member management / project deletion
Under the Manage access page, users can add or remove project members, and can also restrict members' permissions (the specific permissions are explained below).
Viewer       only has access to the project
Deliverer    Access to the project with only permission to download files;
Developer     Can access the project, have permission to modify files/tools/processes; have permission to upload and download files/tools; have permission to post tasks;
When the user completes the project analysis or wrongly creates the project and needs to delete the project, the DELETE button at the bottom can be used to delete the project. Note that when a project is deleted, all project-related information such as files, tools, and processes under the project will be deleted. The resources published in the project have been synchronized in the platform and will not be deleted. If you no longer wish to provide this resource, you need to remove the resource package from the community first when deleting the project.

Project extranet service
Since the FlowHub platform is in the process of task delivery and calculation, in order to protect the security of user data, the machine that calculates the task will not be connected to the network by default. If your tool needs to obtain data from the Internet, you need to go to the project Setting page under the Manage function module , find the Network option, and choose to enable the network protocol. After enabling, you can see the network settings section on the tool editing page, and you can choose whether to enable the network according to the tool's needs.

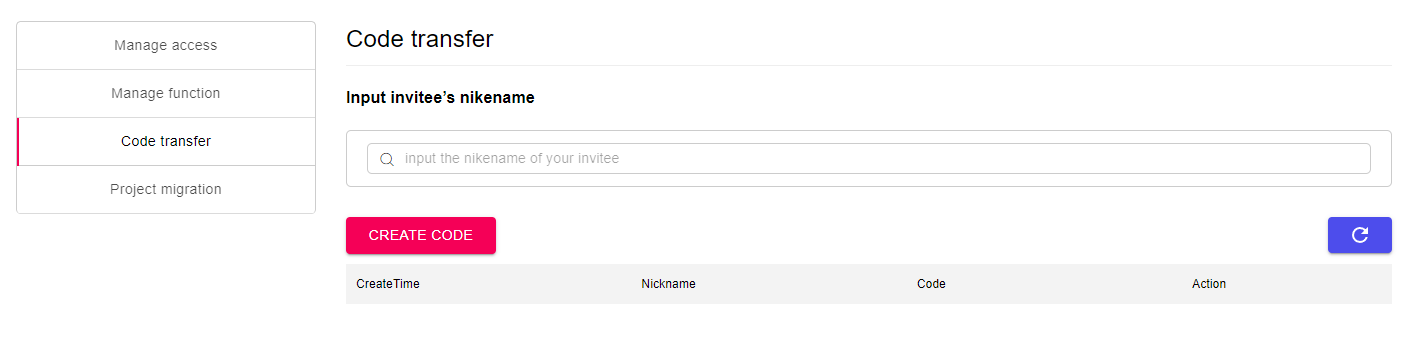
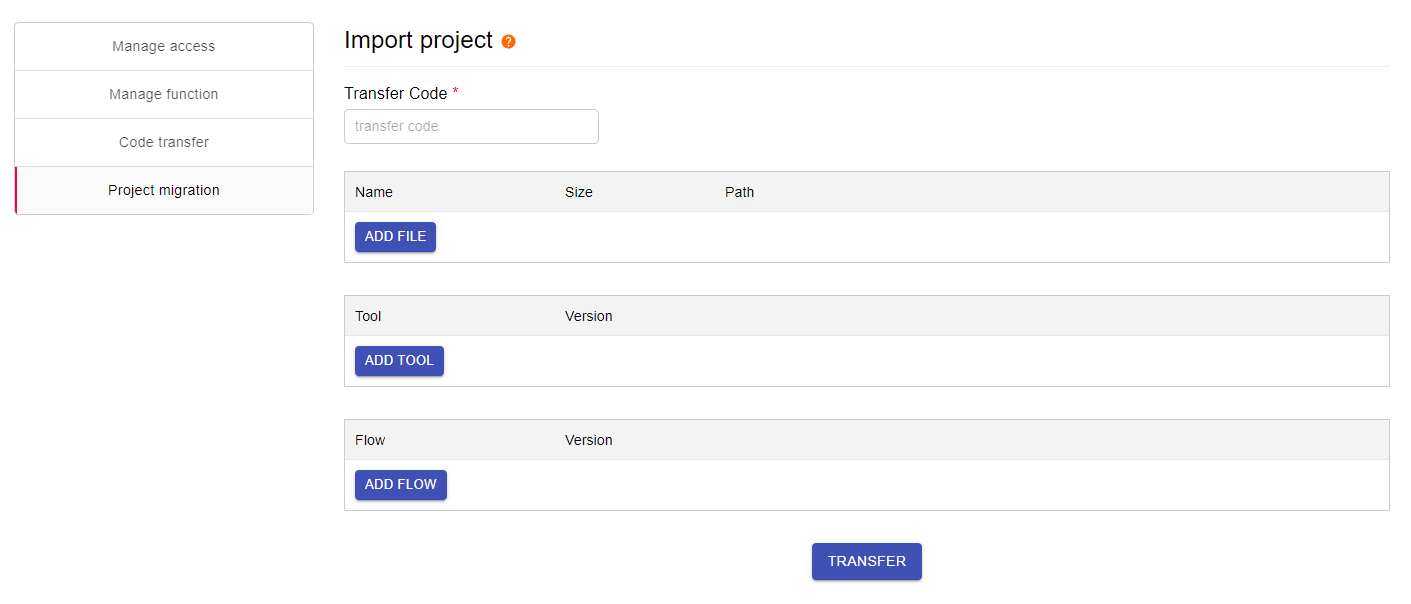
Project data migration
When the project leader changes during the project development, users can migrate data between different projects. Project data migration has two sections on the project settings page, Code transfer and Project migration. Specific steps are as follows:
1) The original owner A of the project discusses with the new owner B of the project to determine the files, tools, processes, etc. to be transferred. 2) B creates a new project under his own account (or under the original project), enters the Code transfer section, enters A's username, and generates a project migration code. 3) B sends the migration code to A separately. After A obtains the migration code, A enters the project to be migrated, enters the Project migration section of the settings page, enters the migration code provided by B, and selects the files to be transferred in turn. After completing the selection, click Migrate to complete the migration of files, tools, and processes.