Create a job
After we have completed the flow creation, we can start to submit jobs and analyze based on the created flow. Let's take the flow named xxx of our subscription as an example to introduce.
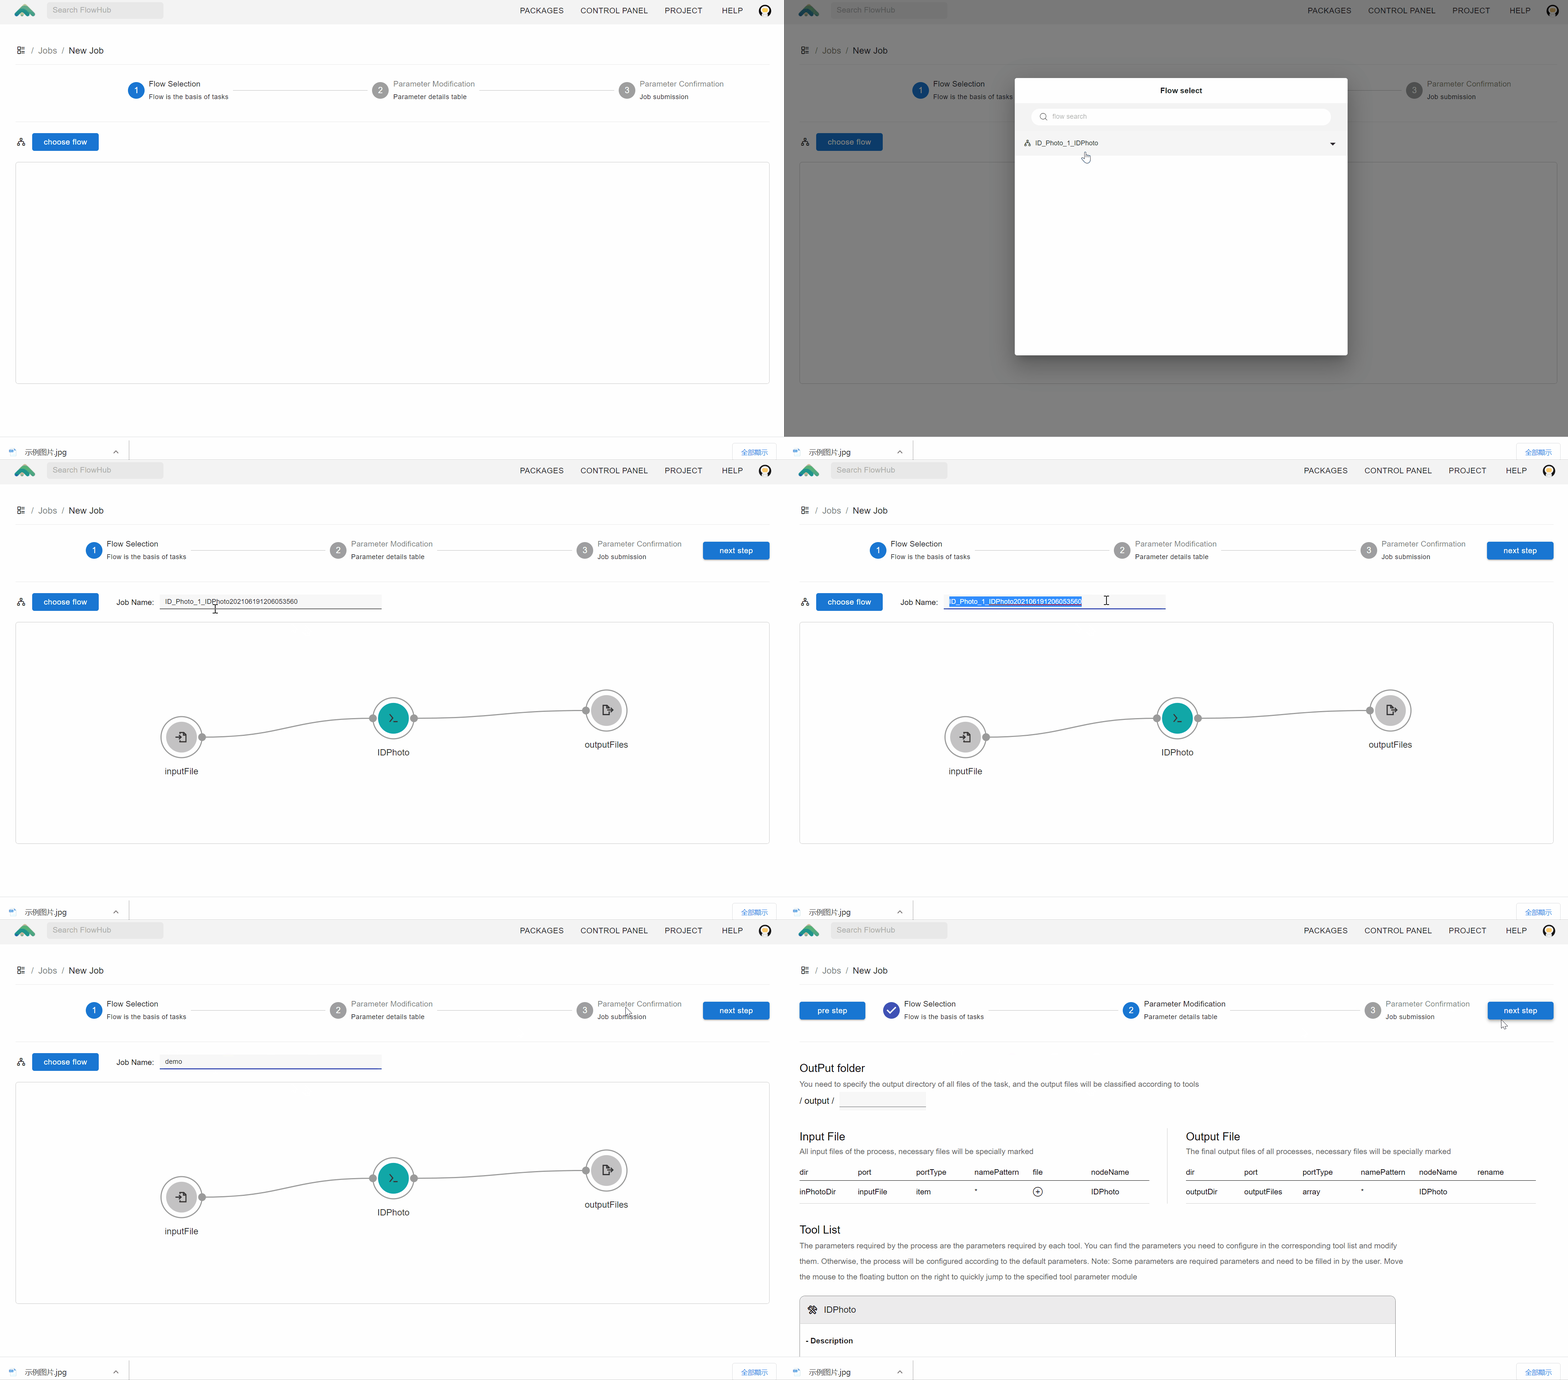
First, we enter the corresponding project, click the ‘Job’ button in the navigation bar, and click the ‘Create job’ button on the right side of the bottom. You will enter the job creation page.

The first step: selection flow
After creating a new job, in the first step, we need to click the ‘choose flow’ button to select the flow version you want to run. Here we select the flow named ‘ID -photo_1_IDPHOTO’ that we just subscribed to. After the selection is completed, the name of the job will appear on the page. The name is named according to the ‘flow’s name + current time’. You can adjust or modify it by yourself. Do not use the existing job name. After the selection is complete, click ‘next step’.

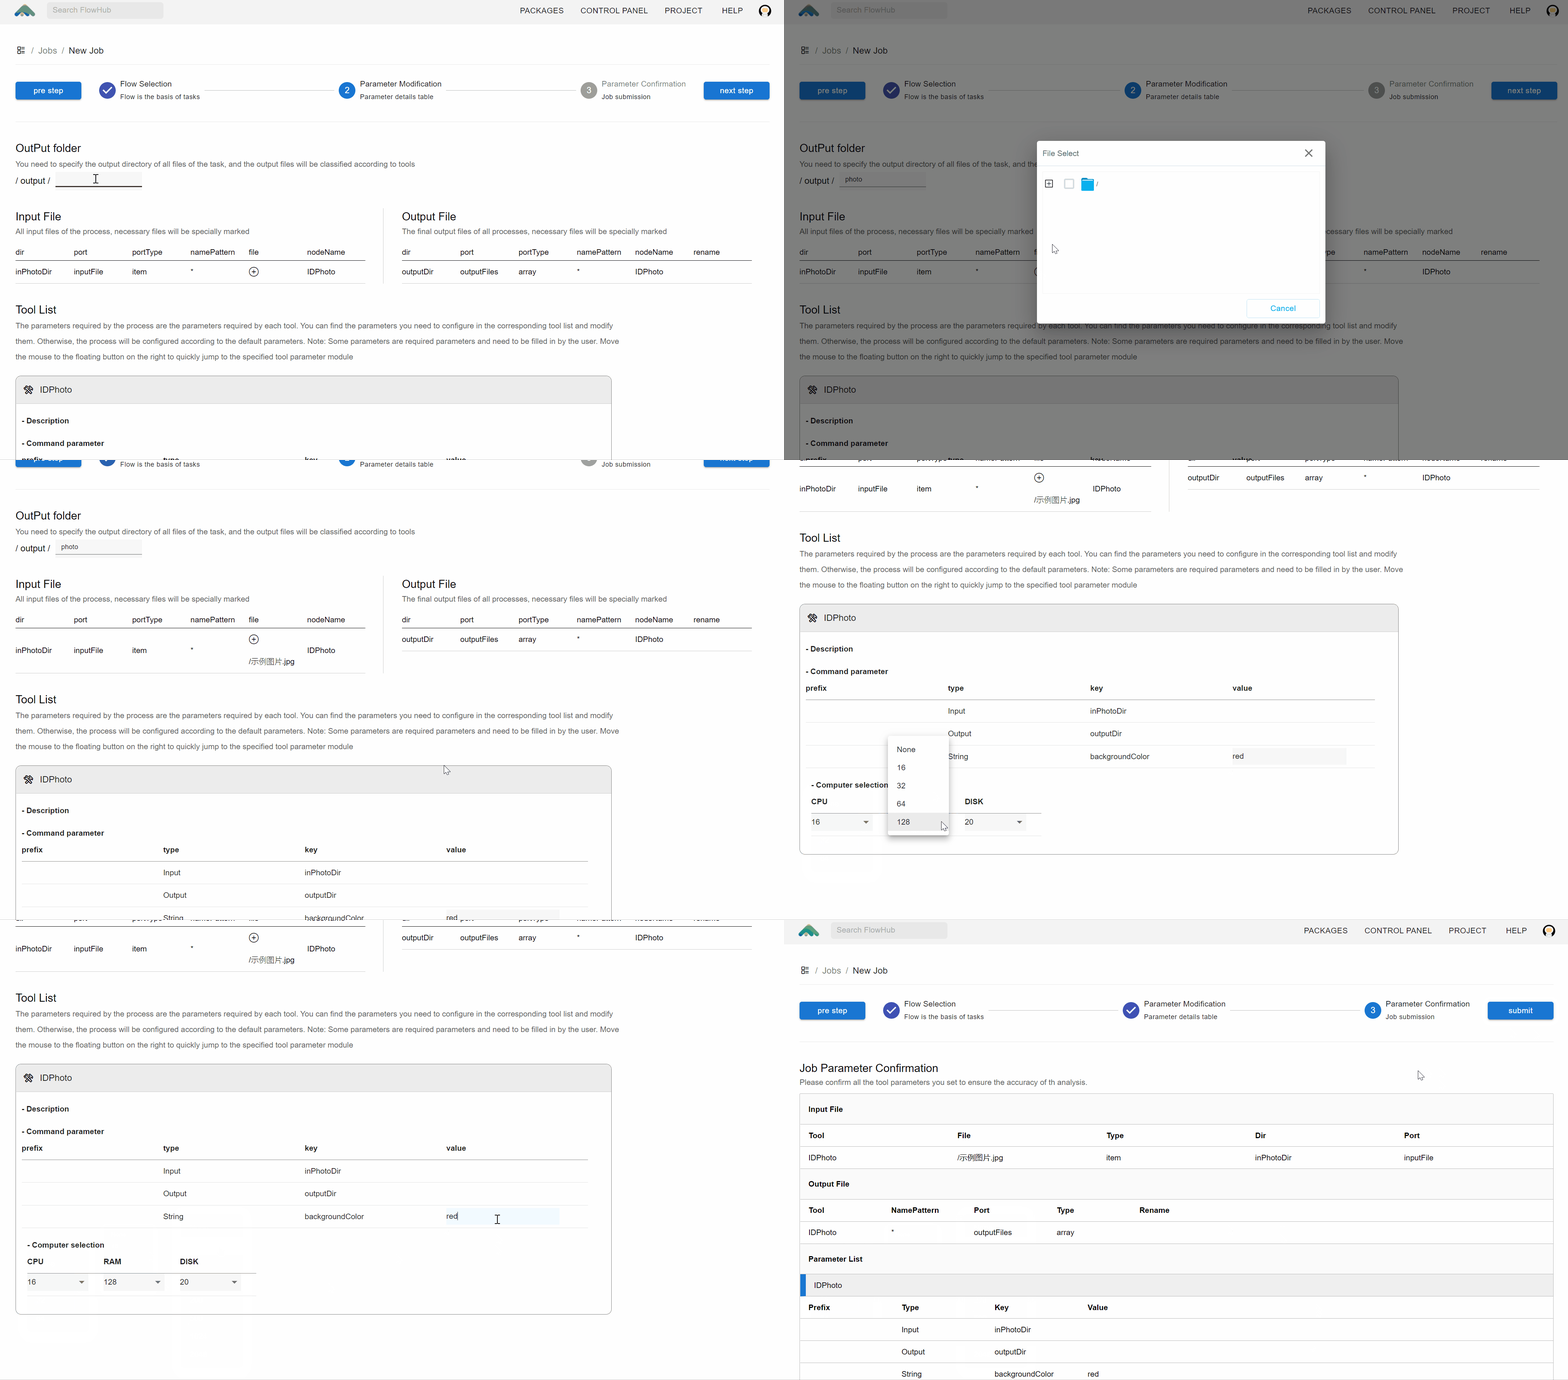
Step 2: flow parameter configuration and input /output file setting
You will determine the input and output information, as well as the used tool information. The final result of the job will be uniformly export to the output folder in File (for the convenience of unified management of the output results). After setting all parameters, click ‘next step’ to enter the next step.
| Type | Description |
|---|---|
| Output Folder | It determines the folder for the job output. In the file module, we set a unified output directory. The results of all tasks will be input to the output directory. You need to set a folder name that does not duplicate the name under output. When you submit a task, it will automatically create and output the results to this folder. Note that the output results are classified by tools. During the process, the output files of the tools will be placed in the folder named after the tool. (You can go to view after the job is completed) |
| Input File | It determines the file for the job input. label is the port of the tool in the flow, node Name is the name of the tool in the flow, the user needs to click the’+’ button to specify the input file of the project. |
| Output File | It determines the file for the job output., label is the port of the tool in the flow, node Name is the tool name in the flow, file Name is the output name of the file, rename is the name of the output file to be renamed, if not set, the output file will be named according to fileName mode. |
| Tool List | The tool configuration information corresponding to the flow. You can view the parameters of the tool used in the job process. If the default parameters of the tool need to be adjusted, you can directly adjust it in the list below. |

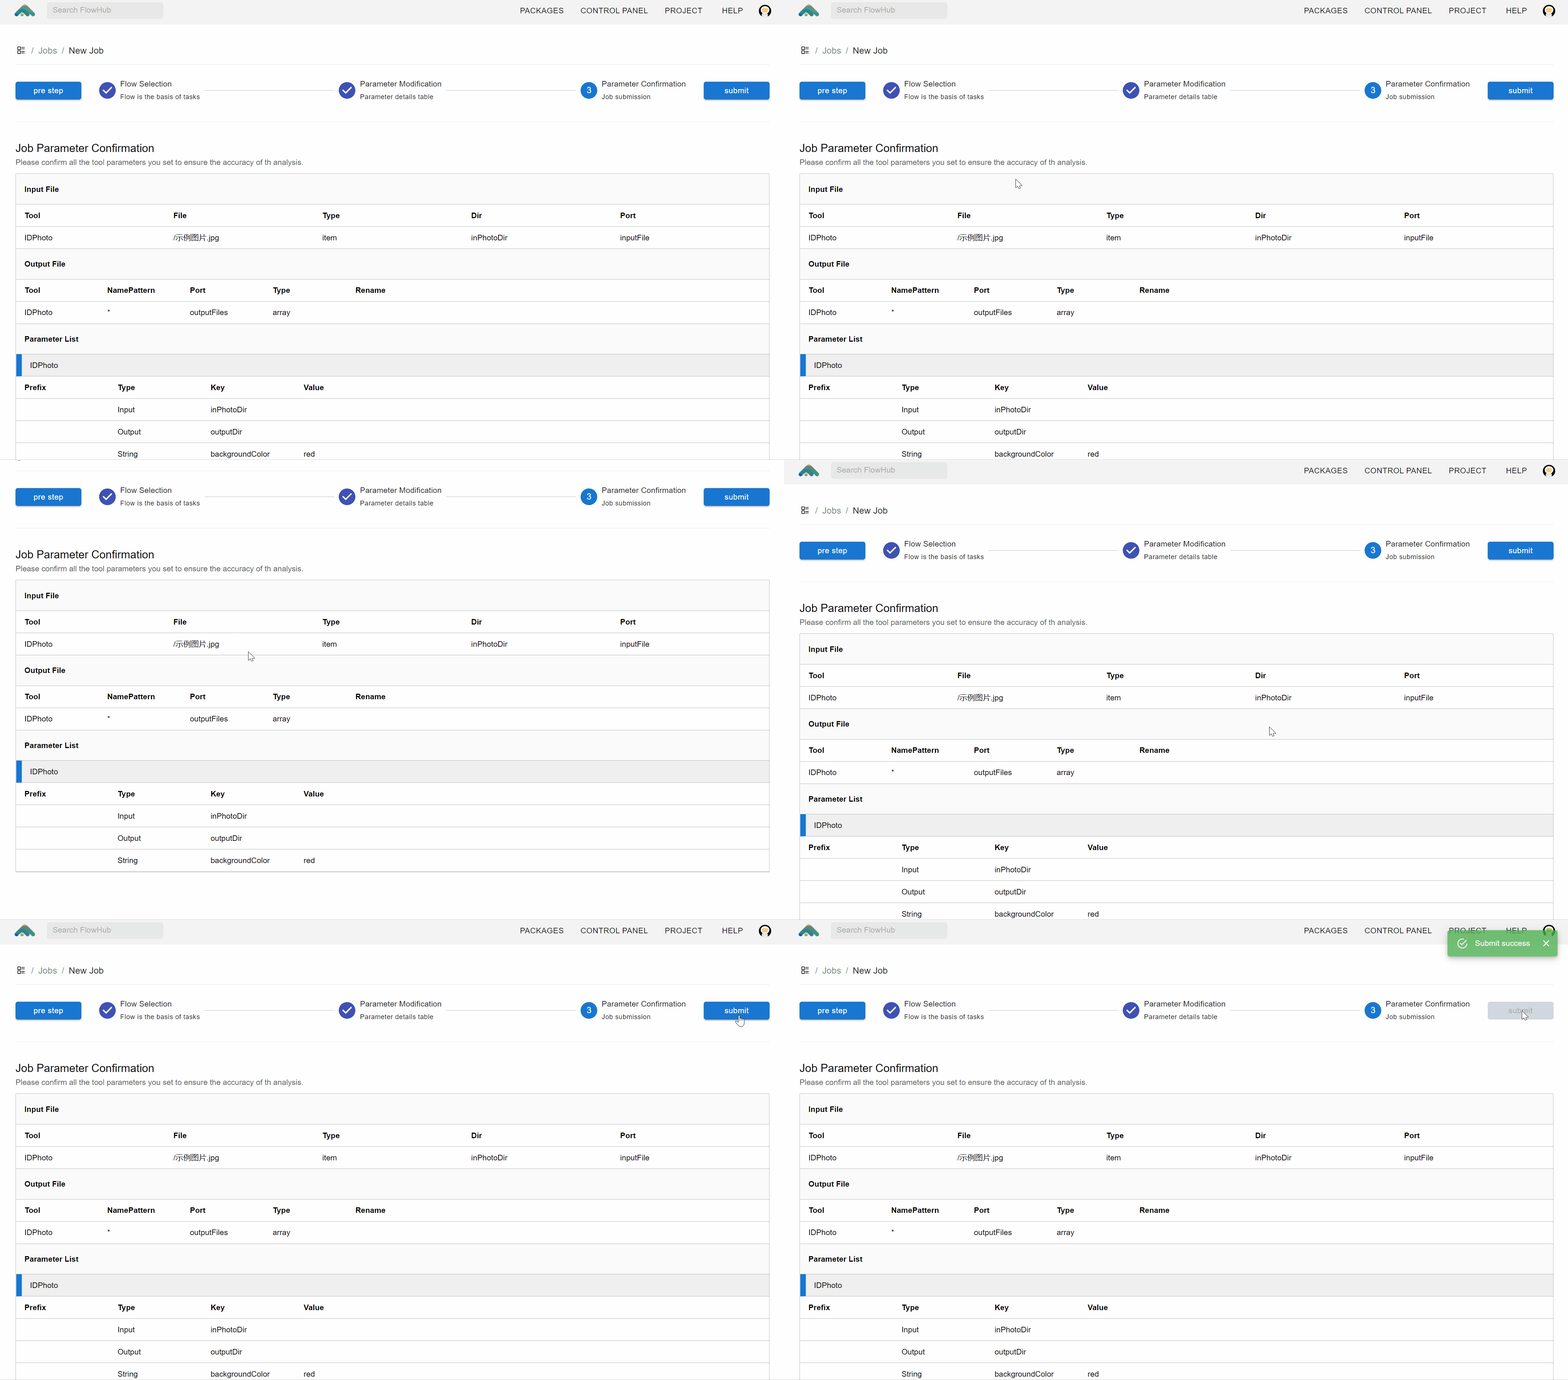
Step 3: Confirmation of job configuration / submit job
We enter the last step before the job submit. On this page, we will summarize all the input and output file information involved in the second step, as well as the parameter information of each tool, into a table. The user needs to check all the information to ensure that the task is correct. Accuracy, and the form can be saved at the same time, so that you can understand the specific parameter information of the job in subsequent analysis. Of course, you can also query the corresponding job information in the job list to view the configuration information.

The full process of create a job like the next picture.
